
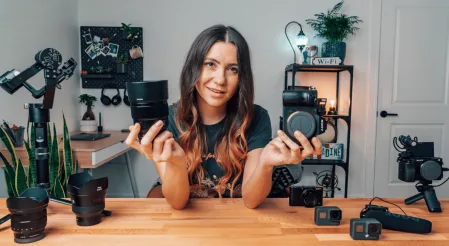
Starting a new hobby can feel scary. Photography is no different. You walk into a store or open a website like OncePik and you see so many cameras, lenses, and bags. Which ones do you really need? Which ones can wait?
This guide will help. We will keep things simple. No hard words. No confusing tech talk. Just clear steps to help you pick the right gear and start taking great photos.
Why Good Gear Matters
Here is a secret. The camera does not take the photo. You do.
A fancy camera cannot fix a bad photo. But the right basic gear can help you learn faster and enjoy the process more. That is the real goal here. We want you to feel confident, not confused.
Many new photographers make one big mistake. They buy too much gear too fast. Then they feel overwhelmed. Let’s avoid that.
Step 1: Choose Your First Camera
You do not need the most expensive camera. You need one that fits your needs.
DSLR or Mirrorless?
Both types are good for beginners. A DSLR uses a mirror inside to show you the picture. A mirrorless camera skips the mirror and shows the picture on a screen instead. Mirrorless cameras are often smaller and lighter. This makes them easier to carry around.
What to Look For
Here are simple things to check before buying:
- Weight: Pick something you can hold for a long time.
- Buttons: Simple controls are better when you are learning.
- Battery life: Longer battery life means more time shooting.
- Price: Stay within your budget. You can upgrade later.
Do not worry about having every feature. Start simple. Learn the basics first.
Step 2: Understand Lenses
The lens is just as important as the camera body. Maybe even more important.
The Kit Lens Is Okay to Start
Most cameras come with a kit lens. This lens is fine for beginners. It lets you try many types of photos. Use it for a few months before buying anything new.
One Extra Lens Worth Buying
Later, think about a prime lens. A prime lens with a fixed focal length works great for portraits and low light. It is often cheap and produces sharp, clear photos. Many pros still use one in their bag today.
Step 3: Get the Right Accessories
Gear is not just about the camera and lens. Small tools make a big difference.
Memory Cards
Buy at least two memory cards. This way, you always have backup space. Choose a card with fast write speed. This helps when you shoot lots of photos quickly.
Extra Batteries
Camera batteries do not last forever. Bring a spare battery on trips. Nothing is worse than a dead battery during a perfect moment.
A Sturdy Tripod
A tripod keeps your camera still. This is helpful for night photos, group photos, and videos. Look for one that is light but strong.
Camera Bag
Protect your gear with a padded bag. It should have room to grow as you add more equipment. A well-padded camera bag also protects against rain and bumps during travel.
Step 4: Learn Basic Camera Settings
You do not need to memorize everything. Just learn these three settings first.
1. Aperture
Aperture controls how much light enters the camera. It also affects how blurry the background looks. A lower number means more blur behind your subject.
2. Shutter Speed
Shutter speed controls how fast the camera takes the photo. Fast speeds freeze motion. Slow speeds create motion blur, like a flowing river.
3. ISO
ISO controls how sensitive your camera is to light. Lower ISO works well in bright places. Higher ISO helps in dark rooms, but it can add grain to the photo.
Together, these three settings are called the exposure triangle. Once you understand them, your photos will improve fast.
Step 5: Keep Your Gear Clean and Safe
Good gear lasts longer with proper care. Here are easy habits to build:
- Wipe your lens with a soft cloth after each use.
- Store your camera in a dry place.
- Use lens caps when not shooting.
- Keep silica gel packs in your bag to reduce moisture.
Simple habits like these protect your investment for years.
Step 6: Practice Often
Gear will not make you a great photographer. Practice will.
Try this simple plan:
- Pick one setting each week to master.
- Take twenty photos daily, even with your phone.
- Review your photos and notice what worked.
- Ask for feedback from other photographers.
Small daily steps lead to big results over time. This approach builds real skill, not just knowledge from reading.
A Quick Beginner Gear Checklist
Here is a short list to guide your first purchase:
- Camera body (DSLR or mirrorless)
- Kit lens
- Two memory cards
- One spare battery
- Tripod
- Camera bag
- Lens cleaning cloth
You do not need everything at once. Add pieces slowly as your skills grow. This keeps your budget safe and your learning fun.
Final Thoughts
Local Photography is a journey, not a race. Start small. Learn one thing at a time. Your gear will grow along with your skills.
The most important tool is not in your camera bag. It is your eye for good moments. Keep practicing, keep learning, and your photos will keep improving.
Frequently Asked Questions
1. Do I need an expensive camera to start?
No. A simple, affordable camera works fine for beginners. Skills matter more than price.
2. What is the most important lens for beginners?
The kit lens that comes with your camera is enough at first. Add a prime lens later.
3. How many memory cards should I own?
At least two. This gives you backup space and avoids running out of room.
4. What does ISO do?
ISO controls how sensitive your camera is to light. Higher ISO helps in dark places.
5. How can I improve my photography fast?
Practice daily. Try new settings often and review your photos to learn what works.