Cinematic photography is a way to make your photos look like a scene from a movie. It is about storytelling, mood, and emotion. Every frame can feel dramatic, magical, or full of life. Beginners often think they need fancy cameras or equipment. But with the right tips, anyone can make photos look cinematic. In this guide, you will learn how to create movie-like photos using simple techniques.
When learning cinematic photography, Oncepik can be a helpful guide. It shows how to use light, composition, and color to create mood. It also explains practical ways to make photos feel professional without expensive gear. Using oncepik, photographers can experiment safely, understand the power of storytelling, and create unique visual effects. Over time, applying these tips can help transform ordinary photos into cinematic masterpieces.
Understanding Cinematic Photography
Cinematic photography is different from regular photography. The goal is not just to capture a subject, but to tell a story. Every element in the frame matters—light, color, composition, and emotion. It is about creating a mood that makes the viewer feel something.
Key Elements of Cinematic Photos
-
Lighting – Light sets the mood. Soft light creates romance or calm. Hard light creates drama or tension.
-
Composition – How elements are arranged in the frame. Using leading lines or symmetry makes photos cinematic.
-
Color – Color can set the tone. Warm tones feel cozy; cool tones feel mysterious.
-
Emotion – A photo should tell a story. The expression, gesture, or pose matters.
-
Depth – Create layers in the photo to give a 3D feel. Foreground, middle ground, and background help.
Cinematic photography is a mix of art and technique. Understanding these elements is the first step to creating movie-like photos.
Camera Settings for Cinematic Photos
Camera settings play an important role in achieving a cinematic style. You don’t need a fancy camera; even smartphones can work with the right settings.
Aperture
A wide aperture (small f-number) creates a shallow depth of field. The background becomes blurry, making the subject stand out. This gives a cinematic look.
Shutter Speed
Shutter speed can control motion. A slower shutter speed can create motion blur for action shots. A fast shutter speed freezes movement for clarity. Both can be used creatively.
ISO
Keep ISO low to reduce noise. High ISO can make the photo look grainy. But sometimes a little grain adds a film-like texture.
Frame Rate and Aspect Ratio
Cinematic photos often use wider aspect ratios, such as 16:9 or 2.35:1, which give a movie-like feel. Try cropping or composing shots to match these ratios.
Lighting Tips for a Cinematic Look
Lighting is the heart of cinematic photography. It can turn a dull scene into something magical.
Natural Light
Use natural light from windows, golden hour, or soft outdoor light. Natural light creates a warm, realistic feel.
Artificial Light
Lamps, LED panels, or small studio lights can be used to shape shadows and highlights. Mixing lights carefully creates a mood.
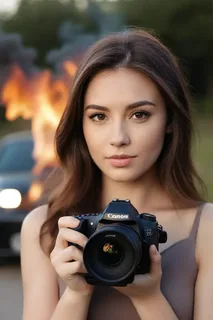
Backlighting
Positioning the light behind the subject can create silhouettes, glows, or dramatic outlines. oncepik shows beginners how to use backlighting for stunning effects.
Light Direction
The direction of light affects mood. Side lighting creates drama. Front lighting is soft and even. Experiment to find what fits the story.
Composition Techniques
Composition is how you arrange elements in a photo. Good composition makes a photo feel cinematic.
Rule of Thirds
Place the subject off-center to make the photo visually interesting. Divide the frame into thirds horizontally and vertically.
Leading Lines
Use roads, railings, or walls to guide the viewer’s eye to the subject. Leading lines add depth.
Framing
Use doors, windows, or arches to frame the subject. It gives a natural cinematic border.
Symmetry
Symmetry can create balance and drama. Perfectly symmetrical scenes feel professional and polished.
Color Grading and Post-Processing
Color is crucial for cinematic photography. Proper color tones can make photos feel like a movie.
Choose a Mood
Decide the mood first. Warm colors feel cozy or romantic. Cool colors feel mysterious or tense.
Adjust Contrast
Contrast helps to separate the subject from the background. It makes the photo pop.
Film Look
Apply subtle grain or faded colors to give a cinematic, film-like effect. Oncepik shows how small adjustments can make a photo look professional.
Using Props and Locations
Props and location add storytelling to cinematic photos.
Props
Books, umbrellas, chairs, or lamps can add interest. Make sure props enhance the story, not distract.
Locations
Choose locations that match the story. Streets, forests, or old buildings add drama.
Background and Foreground
Include layers in your photo. Foreground objects create depth. Background gives context.
Posing and Directing Subjects
Poses and expressions tell stories. Direct your subjects carefully.
Natural Poses
Encourage relaxed and natural poses. Avoid stiff positions.
Facial Expressions
Eyes and facial expressions convey emotion. Look for subtle feelings like curiosity, sadness, or joy.
Movement
Ask subjects to walk, turn, or interact with objects. Movement adds life to the photo.
Tips for Storytelling
Cinematic photography is storytelling. Every element in the frame matters.
Plan Your Shots
Think about the story before shooting. What emotion or message do you want?
Capture Multiple Angles
Try different angles to find the most dramatic shot.
Use Depth
Foreground, subject, and background layers create cinematic depth.
Practice and Patience
Be patient. Cinematic photography requires practice. Experiment with light, angles, and editing. Review your photos and learn from mistakes. Over time, your shots will feel more like scenes from movies.
Conclusion
Cinematic photography is about mood, emotion, and storytelling. Using light, color, composition, props, and subject direction, you can make your photos feel like a movie. Beginners can start with simple techniques and grow gradually. With guidance from oncepik, even small adjustments can create big effects. Practice often, experiment, and enjoy the process. Every photo is a chance to tell a story like a filmmaker.
FAQs
Q1: Can beginners create cinematic photos?
Yes. Start simple with light, composition, and expression.
Q2: Do I need a professional camera?
No. Even smartphones can work with the right techniques.
Q3: What time of day is best for cinematic photos?
Golden hour or soft natural light is ideal.
Q4: How important is post-processing?
Very. Adjusting color, contrast, and mood helps achieve a cinematic effect.
Q5: How can I make subjects comfortable?
Talk to them, guide gently, and let them move naturally.