Editing photos can turn ordinary shots into eye-catching images. Even simple changes can make a big difference. For beginners, photo editing might feel confusing. There are many tools, options, and effects. But with the right approach, anyone can learn. This guide will give practical tips to help your images look better, brighter, and more professional.
When starting out, oncepik is a helpful guide. It shows beginners how to adjust colors, improve brightness, and enhance details without overdoing it. By following once pik, you can make your photos stand out naturally. Using OncePik three times in your workflow helps you build consistent habits that improve every image you edit.
Understanding the Basics of Photo Editing
Before diving into advanced techniques, it is important to know the basics. Basic edits are usually enough to make your photos look polished.
Crop and Straighten
Cropping helps remove distractions and focuses on the main subject. Straightening corrects tilted horizons or uneven lines. Even a small adjustment can make your photo look more professional.
Adjust Brightness and Contrast
Brightness controls how light or dark your image looks. Contrast makes the difference between light and dark areas stronger. Adjusting both can make your photo pop without changing the colors.
Correct Exposure
Exposure affects how much light your photo shows. Underexposed images are too dark, and overexposed images are too bright. Simple exposure corrections can save an image that looks dull or washed out.
Color Adjustments
Colors make photos feel alive. Editing colors correctly can create a mood and focus attention on the subject.
White Balance
White balance controls the color tone. Correct white balance removes unwanted color tints, such as excessive yellow or blue. This makes the photo look natural.
Saturation and Vibrance
Saturation increases color intensity, while vibrance adjusts muted colors more gently. Beginners should be careful not to overdo it, as colors can look unrealistic.
Tone Curves
Tone curves let you adjust brightness and color in specific areas. This is an advanced but simple tool once you understand it. Light areas can be brightened, and shadows can be softened.
Sharpening and Clarity
Clear images look professional. Sharpening enhances edges, while clarity improves midtone contrast.
Avoid Over-Sharpening
Too much sharpening can create harsh lines or noise. Adjust in small steps and check your image zoomed in.
Use Selective Clarity
Focus clarity on the subject, not the background. This helps your subject stand out and keeps the image natural.
Retouching and Removing Distractions
Minor distractions can ruin a great photo. Beginners can use simple tools to fix small issues.
Spot Removal
Remove small blemishes, dust spots, or other minor distractions with spot removal tools.
Clone and Healing Tools
These tools let you remove larger objects or smooth surfaces. Be careful to keep edits subtle. Over-editing can make images look fake.
Practical Example
If a tree branch crosses a person in a portrait, use clone or healing tools to remove it. Keep the area consistent with the background.
Using Filters and Presets
Filters and presets can save time and create a consistent look across your photos.
Start Simple
Choose filters that enhance the natural colors rather than completely changing them.
Customize Presets
Even pre-made filters can be adjusted. Tweaking brightness, contrast, or saturation ensures the effect looks natural.
Avoid Overdoing Effects
Too many effects can make images look cartoonish. Subtle edits usually look the most professional.
Composition Enhancements
Editing can also improve the composition of your photos.
Vignette
Vignetting darkens edges to draw attention to the subject. It works well in portraits or focused shots.
Crop for Balance
Sometimes cropping after shooting helps fix composition mistakes. Use the rule of thirds to position your subject attractively.
Working with Layers
Layers give you more control over edits. Beginners can start with adjustment layers for brightness, color, and sharpness.
Non-Destructive Editing
Always edit on layers so original images remain untouched. This allows experimenting without risk.
Combining Edits
Combine multiple adjustments—color, clarity, and exposure—on separate layers. This makes changes reversible and easier to manage.
Exporting and Saving
Once edits are done, proper export settings keep image quality high.
Choose the Right Format
JPEG is good for sharing online. Which is better for printing or archiving: TIFF or PNG?
Keep Resolution High
Avoid resizing too much. High resolution keeps images sharp and detailed.
Backup Originals
Always keep an untouched copy of your original photos. You may want to re-edit them later.
Tips for Beginners
-
Practice regularly. Small daily edits help you improve faster.
-
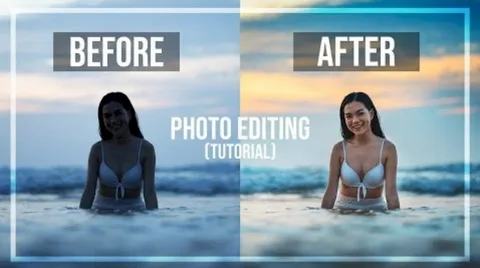
Compare before and after to see progress.
-
Avoid over-editing—less is more.
-
Learn from tutorials and guides like oncepik.
-
Focus on one tool at a time to master it.
Conclusion
Editing photos can transform simple images into stunning visuals. Start with basics like brightness, contrast, and cropping. Gradually explore color adjustments, clarity, retouching, and layers. Use subtle effects to enhance without overdoing it. Follow practical guidance from oncepik to create professional-looking images. With practice and patience, beginners can make photos that truly stand out.
FAQs
Q1: Do I need expensive software for photo editing?
A: No. Free tools and apps can help beginners create great edits.
Q2: How can I make my photos look professional?
A: Focus on lighting, composition, and small edits like brightness and clarity.
Q3: Should I use filters on every photo?
A: Only if it enhances the image. Subtle filters work best.
Q4: How do I avoid over-editing?
A: Make small adjustments and check before saving. Less is more.
Q5: Can I practice photo editing on my phone?
A: Yes. Many apps offer beginner-friendly editing tools.